Table of Contents
Ever looked at those intricate henna designs and thought, "No way, I could never do that"? I get it. Those elaborate patterns can seem daunting, like some kind of secret code only a few can crack. But guess what? Creating beautiful henna art doesn't have to be a masterclass in fine arts! This article is all about making it super easy, focusing on simple designs that anyone can pull off, even if you've never touched a henna cone before. We’re ditching the pressure and jumping into the fun part: learning to create your own easy and simple henna designs. We'll start with the basics, showing you how to get the hang of simple strokes and patterns. Then, we'll move on to some cool designs you can try on your hands and feet. Think of it as a chill guide, not a strict lesson, and by the end, you'll be rocking your own henna art like a pro, or at least like someone who had a good time trying!
Getting Started with Easy Henna Designs
Getting Started with Easy Henna Designs
Gathering Your Supplies
Okay, so you're ready to dive into the world of henna, that's awesome! First things first, let's talk supplies. You don't need a fancy art studio to get started. A good quality henna cone is your best friend, look for one that's pre-made with natural henna. You'll also want some paper towels or a damp cloth for quick clean ups, because things can get messy, trust me. And finally, a design idea, maybe a simple swirl or dot pattern, or even just some lines. Don't overthink it, the idea is to start simple. Oh, and a little tip from my own experience: have a small bowl of water nearby. You can use a damp cotton bud to fix any small mistakes.
Now, let's talk about the henna itself. The quality of your henna paste makes a huge difference in how your design turns out. Always opt for natural henna paste; avoid those with added chemicals because they can cause skin irritations. If you're making your own paste, make sure you use good quality henna powder, lemon juice, and essential oils. But honestly, for beginners, pre-made cones are just so much easier. It is less mess, and more practice time. And if you're practicing, grab some paper to test your designs first before going straight to your skin. It’s all about feeling comfortable with the flow of the henna.
Essential Tools Checklist
- Pre-made natural henna cones
- Paper towels or damp cloth
- Small bowl of water
- Cotton swabs or buds
- Paper for practice designs
Mastering Basic Strokes
Alright, you've got your supplies, now let's get into the nitty-gritty: the strokes. Think of it like learning to write, you start with simple lines and curves. That is the same for henna. Squeeze the cone gently, and practice making dots, straight lines, and curves on paper first. The key is to maintain a steady pressure, it's like a dance, not a sprint. Don’t worry if your lines are wobbly at first, it takes practice. I remember when my first few lines looked like a toddler tried to draw a straight line after drinking a lot of juice. It’s all part of the process.
Once you feel more comfortable with the basic strokes, try combining them. A dot next to a line, a curve followed by another curve, it's like building with Lego blocks. Don't try to copy complex designs right away. Start with small, manageable patterns and then build your way up. And remember, there's no such thing as a perfect line. Embrace the imperfections, they give your designs character. And if you make a mistake? No big deal. Just wipe it away with a damp cloth and try again. It's all about having fun and getting comfortable with the henna.
Stroke Type | Description | Tips |
|---|---|---|
Dots | Small, circular marks | Apply even pressure for uniform dots |
Straight Lines | Continuous, even lines | Maintain a steady hand and consistent pressure |
Curves | Smooth, flowing lines | Practice the motion on paper first |
Simple Henna Patterns for Hands and Feet
Simple Henna Patterns for Hands and Feet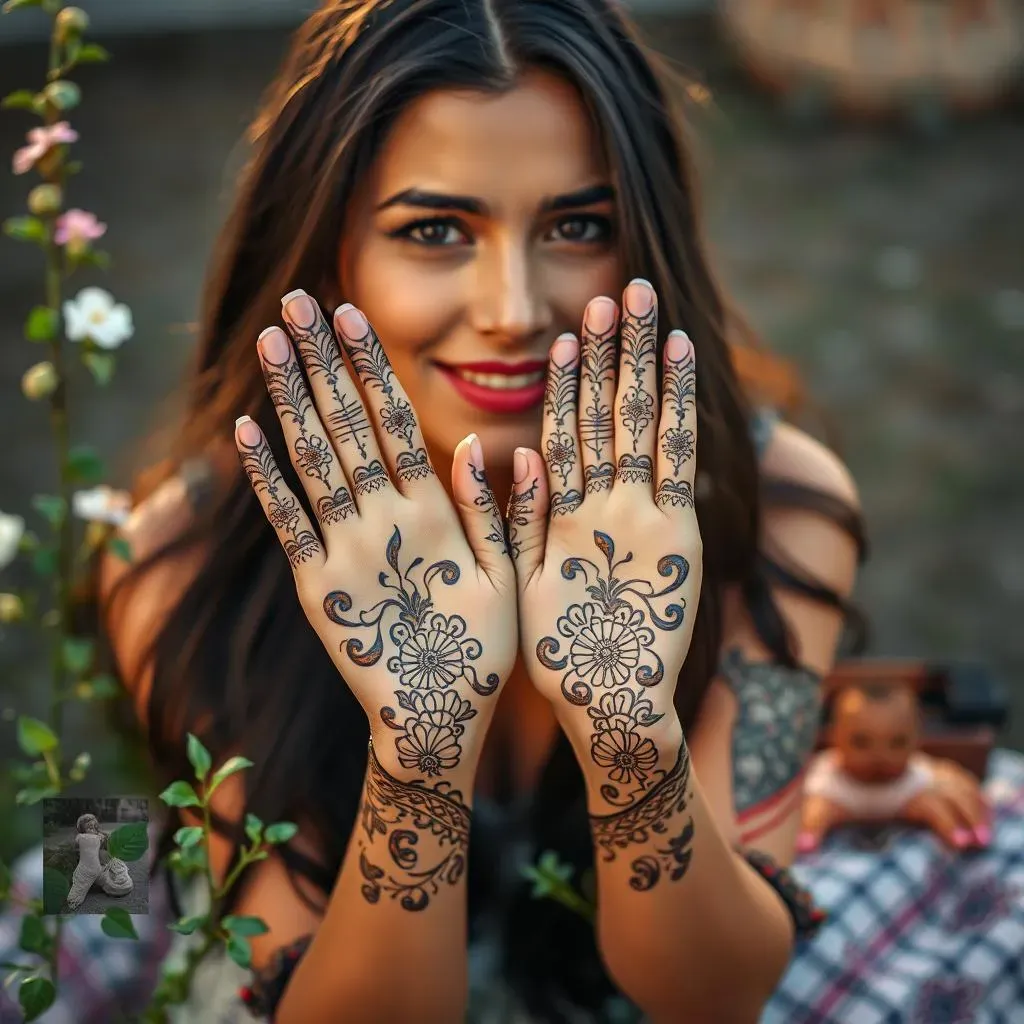
Easy Designs for Your Hands
Okay, so you've got the basic strokes down, now let's get to the fun part: decorating your hands! When it comes to simple henna patterns for hands, think minimalist. A line of dots along your finger, a simple swirl on the back of your hand, or a few small flowers are all great places to start. The key is not to overcomplicate things. I remember when I first tried henna, I went all out trying to copy a super complex design. It was a disaster. So trust me, start small and build up your confidence.
Another great idea is to use geometric shapes. Simple triangles, squares, or even a series of small lines can create a cool and modern look. Remember, it doesn't have to be perfect. The beauty of henna is in its natural, organic look. And if you are like me, you will love that every design is unique. So, don't stress about making it look exactly like a picture you saw online. Just have fun with it and let your creativity flow. Maybe start with some simple lines and dots, and then start adding to it.
Simple patterns for hands
- Simple dots along fingers
- Swirls on the back of the hand
- Small floral patterns
- Geometric shapes
Simple Henna Patterns for Feet
Now, let's talk about your feet! Simple henna patterns for feet can be just as beautiful and easy to do. The great thing about feet is that you have more space to work with. A simple vine pattern that wraps around your ankle or a series of dots along your toes can look really elegant. You can also try a simple flower or mandala design on the top of your foot. I personally love using geometric designs on my feet. They look super chic and are easy to create. I like to say that your feet are your canvas, get creative and have fun.
When applying henna on your feet, make sure that you are sitting comfortably. It can be a little tricky to reach some areas, so having a good position helps. Also, be patient, let the henna dry completely before you move around. The last thing you want is to smudge your designs. I once had a henna design that looked great, but I moved too soon and it all got messed up. It was such a bummer, so remember, patience is key. And don’t forget to take some pictures after, show off your amazing work!
Body Part | Pattern Ideas | Tips |
|---|---|---|
Hands | Dots, swirls, small flowers, geometric shapes | Start small and don't over complicate |
Feet | Vines, dots along toes, flowers, mandalas | Be patient and let the henna dry completely |
Combining Designs
Once you've tried some of these simple patterns, you can start combining them to create your own unique designs. Maybe a vine with small dots on your feet, or a swirl with some geometric shapes on your hands. The possibilities are endless. The most important thing is to not be afraid to experiment. Henna is all about expressing yourself, so don't be afraid to try new things and see what happens. You might surprise yourself with your creativity. I remember the first time I combined a few patterns, I was so proud of myself. It was like I created my own little masterpiece. So go ahead, try it, and who knows, you might create something amazing.
Tips and Tricks for Perfecting Your Easy Henna Designs
Tips and Tricks for Perfecting Your Easy Henna Designs
Prepping Your Skin
Okay, before you even touch that henna cone, let's talk skin prep. Clean skin is happy skin, and happy skin makes for better henna designs. Make sure to wash the area you want to decorate with soap and water. Avoid using any lotions or oils, because these can create a barrier that prevents the henna from staining properly. I learned this the hard way when my henna design faded super fast because I was a bit too generous with my moisturizer. Also, if you have any hair on the area, you might want to consider removing it, because it can get in the way and make the application tricky. Think of it like preparing a canvas before painting, it's all about creating the perfect base.
Another tip that I found helpful is to exfoliate your skin gently before applying henna. This helps to remove dead skin cells, which allows the henna to penetrate better. You don't need to do anything too intense, just a gentle scrub will do the trick. And after you've cleaned and exfoliated, make sure to dry your skin completely. Any moisture can affect how the henna stains. So, let your skin air dry or pat it gently with a towel. It’s like making sure the paper is smooth before you start drawing, the details matter. Trust me, these small steps can make a big difference in how your henna designs turn out.
Skin Prep Checklist
- Wash the area with soap and water
- Avoid lotions and oils
- Remove any hair
- Exfoliate gently
- Dry skin completely
Caring for Your Henna Design
Alright, you've created your masterpiece, now it's time to make sure it lasts! Caring for your henna design is crucial for getting the best stain. Once you’ve finished applying the henna, let it dry completely. This might take some time, so be patient. You don't want to move around too much and risk smudging your design. I like to think of it as giving your henna design time to settle in. And once it’s dry, avoid washing the area for at least a couple of hours. The longer you leave the henna paste on, the darker the stain will be. I’ve even slept with my henna on, just to make sure I get that deep color.
After you've removed the dry henna paste, avoid using soap and water for as long as possible. When you finally do need to wash, be gentle and avoid scrubbing the area. You can also apply some natural oil, like coconut or olive oil, to moisturize your skin and help the stain last longer. It's like adding a protective layer to your design. And if you want to make your henna stain even darker, try applying some lemon juice and sugar mixture to the area after the paste has dried, but before you remove it. Just remember, the more you care for your henna, the more vibrant and long-lasting it will be.
Care Step | Description | Tips |
|---|---|---|
Drying | Let the henna paste dry completely | Avoid moving around to prevent smudging |
Washing | Avoid washing for a few hours after | Be gentle when washing |
Moisturizing | Apply natural oil | Helps the stain last longer |
Lemon and Sugar | Apply after paste has dried | Can make the stain darker |
Wrapping Up Your Henna Journey
So, there you have it! You've gone from maybe thinking henna was some impossible art form to having a whole bunch of simple designs in your back pocket. Remember, the key with easy and simple henna designs isn't about perfection, it’s about enjoying the process. Every swirl and dot you create is a little bit of your own personality shining through. It’s okay if your first attempts look a bit wonky; that's part of the charm. Keep practicing, keep exploring, and most importantly, keep having fun with it. Whether you're prepping for a special occasion or just having a creative afternoon, your henna art is a cool way to express yourself. So go on, grab that cone, and let those patterns flow!