Table of Contents
Ever looked at those intricate henna designs and thought, "Wow, I wish I could do that?" Well, guess what? You totally can, especially if you start with something super cool and beginner-friendly like easy henna moon designs. Forget about complicated patterns for now; we're diving into the simple stuff – think elegant crescents, bold full moons, and maybe even a few stars sprinkled in for extra magic. This isn't about becoming a henna pro overnight; it's about having fun and creating something beautiful on your skin. In this article, we will guide you through the basics, showing you how to create stunning moon designs without any fuss. We'll explore simple crescent moon patterns perfect for newbies, then move onto full moon variations that add a bit more flair, and finally, we'll show you how to mix and match moons with other elements. So grab your henna cone, find a comfy spot, and let's get started on your easy henna moon design adventure!
Simple Crescent Moon Henna Designs for Beginners
Simple Crescent Moon Henna Designs for Beginners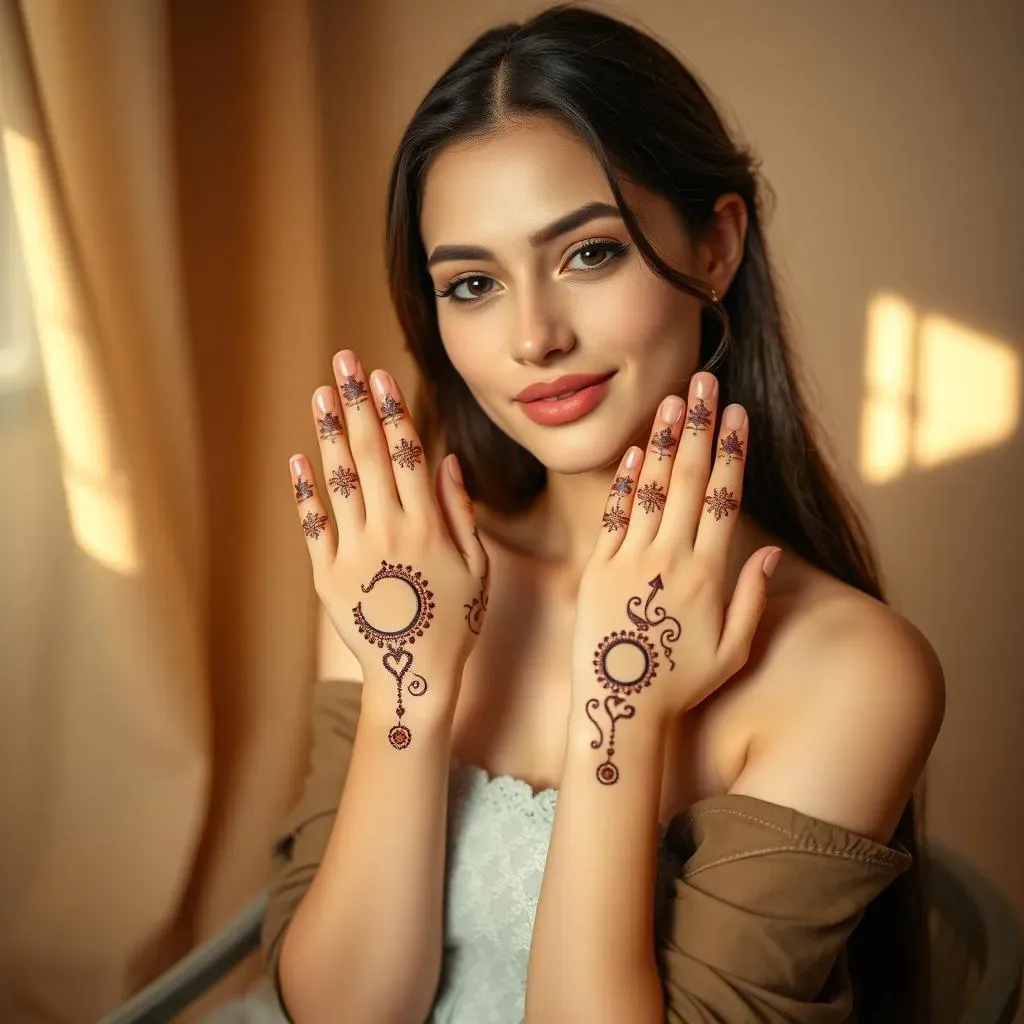
The Beauty of the Basic Crescent
Let's be real, starting with henna can feel a bit daunting. All those swirling patterns and detailed artwork? It's enough to make anyone nervous. But that's where the simple crescent moon comes in as your best friend. It's elegant, it's classic, and it's incredibly easy to pull off, even if you've never held a henna cone before. Think of it as the training wheels of henna – it gets you comfortable with the process without overwhelming you. The basic crescent is just a curved line, but it can be surprisingly versatile. You can make it thick or thin, long or short, and place it practically anywhere on your hand or arm. It's all about getting a feel for the flow of the henna and building your confidence.
I remember my first henna attempt; it looked like a toddler had gone wild with a marker! But the beauty of the crescent moon is its simplicity. You really can't go wrong, and even if it's not perfect, it still looks beautiful. Start with a light touch, and don't worry about getting it exactly right. The goal here is to have fun and get familiar with the henna. This design is so forgiving, you'll be rocking a beautiful moon in no time. It’s the perfect gateway to more complex designs, but honestly, sometimes simple is just the best.
Tips for Perfecting Your Crescent
Okay, so you're ready to draw a crescent moon. Great! Before you start, let's go over a few quick tips to make sure your design looks awesome. First off, make sure your henna cone is prepped and ready to go. This means the tip is nice and clear, so the henna flows smoothly. You don't want a clogged cone messing up your flow! Practice on paper first; it’s always a good idea to get a feel for the pressure you need to apply before you go straight to your skin. Think about the size and curve of your moon. Do you want a wide, gentle curve, or a sharper, more dramatic one? Start with a light touch, you can always go over the line again for a bolder look. I usually like to imagine the curve of a smile or a slice of a watermelon, it helps me get the shape just right.
Another thing to keep in mind is the placement of your design. The curve of your hand or the line of your arm can really enhance the look of the crescent. Don't be afraid to experiment with different angles and positions. And if you make a mistake? No biggie! Just wipe it off quickly with a damp cloth and try again. Henna is temporary, so there's really no pressure to get it perfect. The most important thing is to take your time, focus on the flow of the henna, and enjoy the process of creating something that's all your own. Remember, even the simplest design can look amazing with a little bit of practice and a lot of love.
Tip | Details |
|---|---|
Cone Prep | Ensure the tip is clear for smooth henna flow. |
Practice | Draw on paper first to get a feel for the pressure. |
Curve | Experiment with different curves (gentle or sharp). |
Placement | Consider how the design fits on your hand or arm. |
Mistakes | Wipe off quickly with a damp cloth if needed. |
Full Moon Henna Patterns and Variations
Full Moon Henna Patterns and Variations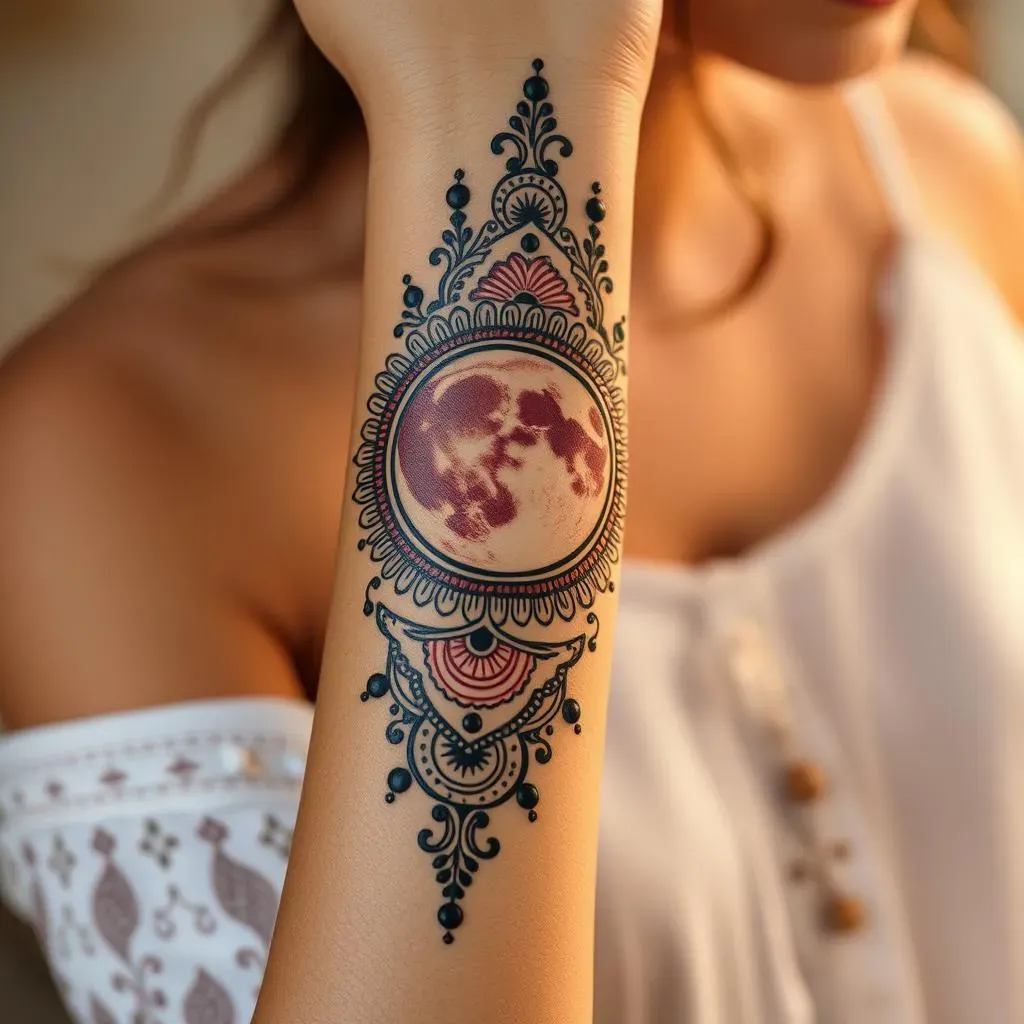
Embracing the Full Circle
Alright, so you've nailed the crescent moon and are feeling pretty good about your henna skills? Fantastic! Now, let's step it up a notch and explore the beauty of the full moon. Unlike the crescent, the full moon is all about that complete circle – it’s a symbol of wholeness and completion. It might look a bit more challenging, but trust me, it’s totally doable. The key here is to take your time and focus on creating a smooth, even circle. Think of it like drawing a big 'O', but with henna. Don't worry about making it absolutely perfect at first. The beauty of henna is that even slightly imperfect circles can look amazing. You can then play around with the thickness of the line, making it bold and solid, or thin and delicate. The full moon is a blank canvas for you to get creative, and its simple shape makes it a perfect base for some cool variations.
I remember the first time I tried a full moon, I was convinced it would look like a lopsided potato. But with a little practice, it actually turned out pretty great! What I learned is that it is not about perfection but about enjoying the process. You might want to start by using a pencil to sketch out the circle lightly on your skin. It could help you get the shape right before you apply the henna. This will give you a guideline, especially if you’re a bit shaky with the cone. Once you are comfortable with making a basic circle, the next step is to customize it further. Think about adding some dots around the circumference, or maybe some swirls inside the circle. It's your moon, so make it your own!
Full Moon Design Ideas
Okay, so you've got the basic full moon down. Now, let's have some fun exploring ways to make it unique. One simple way to make your full moon pop is to add a dotted border around it. Think of it like a tiny string of pearls encircling your moon. It's easy to do and adds a touch of elegance. Or, how about filling the inside of the circle with tiny swirls or geometric patterns? This can add a whole new level of detail. You could even create a spiral design that starts from the center of the moon and swirls outward. It’s like making a tiny galaxy on your skin.
Another cool idea is to combine your full moon with other elements, like stars or small dots. Imagine a full moon surrounded by a constellation of tiny stars or a pattern of small dots scattered around it. These additions can make your design feel more detailed and whimsical. I once saw someone create a full moon that looked like a detailed mandala. They had filled the inside with intricate patterns and it looked absolutely stunning. The possibilities are endless, and the best part is that you can try different things each time. Don't be afraid to play around, experiment with different patterns, and create a full moon design that’s uniquely yours. Remember, the goal is to have fun and let your creativity shine.
Design Idea | Description |
|---|---|
Dotted Border | Add small dots around the moon’s edge. |
Swirl Fill | Fill the moon with swirls or spirals. |
Geometric Patterns | Use geometric shapes inside the moon. |
Starry Surround | Combine the moon with stars. |
Dot Patterns | Add dot patterns around the moon. |
Combining Moons with Other Elements in Easy Henna Designs
Combining Moons with Other Elements in Easy Henna Designs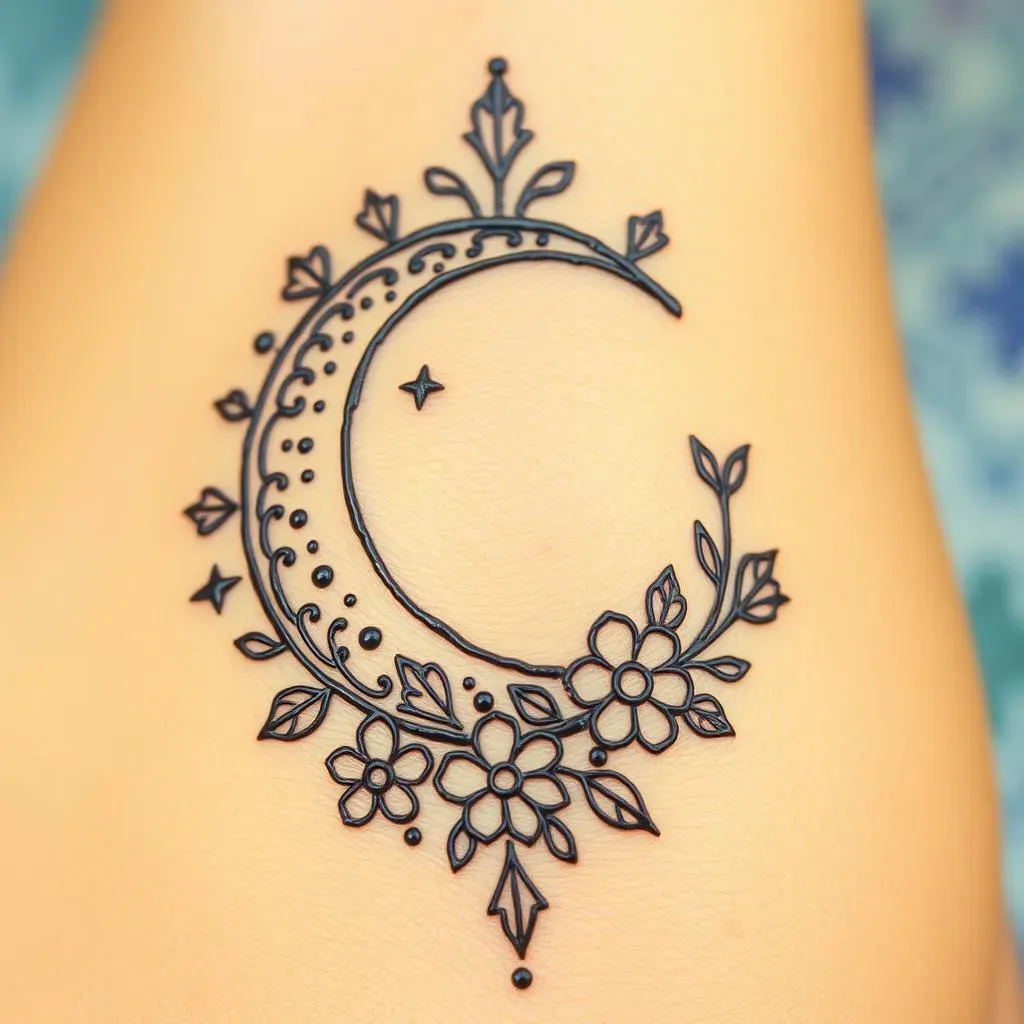
Stars and Moons: A Celestial Duo
Okay, so you've mastered the art of the moon, both crescent and full. Now, let's really get creative by mixing them with other cool elements. One of the most classic combinations is pairing moons with stars. It's like a little night sky right there on your skin! You can use tiny dots to create a constellation around your moon, or you can draw actual five-pointed stars. I love how versatile this combination is; you can go for a minimalist look with just a few stars or create a whole galaxy of them. It's all about what feels right for you. When I first started, I used to just scatter dots randomly, and it still looked amazing. The key is to not overthink it and just have fun with the placement of your stars.
Another fun way to mix moons and stars is to use different sizes and styles. Imagine a large full moon surrounded by tiny, delicate stars, or a crescent moon with a few bolder, more defined stars. The contrast in size and shape adds a lot of visual interest. I remember seeing a design that had a crescent moon with a single, large star next to it, and it looked so simple yet so striking. It’s amazing how just a few elements can come together to create something really beautiful. Don't be afraid to experiment with different combinations and see what you like best. It's all part of the learning process, and every design you create is a step forward.
Adding Floral Touches to Your Moon
Now, let's bring a touch of nature into our designs. Combining moons with floral patterns is another great way to add some flair. Think about adding small leaves or vines that curl around your moon. It’s like creating a little magical garden right on your skin. You can make the flowers really simple, like small dots arranged in a circle, or you can try drawing small petals. The key is to keep it easy and not get bogged down in too much detail. I remember I was trying to draw a rose once, and it looked more like a blob! So, stick to simple shapes, and it will still look beautiful. The beauty of combining moons and flowers is that it brings together the celestial and the earthly, creating a harmonious and balanced design.
Another cool idea is to use floral elements to frame your moon. Imagine a crescent moon nestled between two small flower buds or a full moon encircled by a delicate garland of leaves. These small details can add a lot of charm and make your design feel more complete. I once saw a design where a full moon was surrounded by tiny, intricate flowers, and it looked like something out of a fairytale. The key is to play around with different floral elements and see what works best with your moon design. Don't be afraid to experiment and let your creativity guide you. Remember, henna is all about expressing yourself, so have fun with it!
Element | Description |
|---|---|
Stars | Use dots or five-pointed stars around the moon. |
Flowers | Add simple floral patterns like dots or small petals. |
Leaves | Draw vines or leaves that curl around the moon. |
Dots | Scatter dots to enhance the design. |
Geometric Patterns and Moons
If you’re into a more modern look, try combining your moons with geometric patterns. Think about adding small triangles, squares, or lines around your moon. It's a fun way to create a design that’s both simple and stylish. You could even use geometric patterns to create a border around your moon, giving it a neat and structured feel. I remember I was trying to make a full moon once, and it looked a bit plain, so I added small triangles around it, and it instantly became so much cooler. It’s amazing how just a few simple shapes can transform your design.
Another idea is to use geometric patterns to fill the inside of your moon. Imagine a full moon with a grid pattern inside or a crescent moon with a series of parallel lines. These patterns can add a lot of visual interest and make your design feel more complex, even though they’re actually quite easy to do. I once saw a design where a crescent moon had a series of small diamonds inside, and it looked so unique and modern. The key is to play around with different geometric shapes and see what works best with your moon design. The possibilities are endless, and it’s all about experimenting and finding a style that’s uniquely yours.
Wrapping Up Your Henna Moon Journey
So, there you have it – a simple guide to creating your very own easy henna moon designs. Remember, it's all about starting small, practicing, and most importantly, having fun with it. Don't worry if your first few attempts aren't perfect; that's part of the learning process. The beauty of henna is that it’s temporary, so you can experiment as much as you like. Whether you're rocking a delicate crescent or a bold full moon, each design tells your unique story. Now go forth, create, and let your inner artist shine!