Table of Contents
Ever admired those intricate henna designs on hands and thought, "I wish I could do that"? Well, guess what? You absolutely can! This article is your friendly guide to the world of "henna designs easy hand," where we'll break down the process into simple, manageable steps. Forget complicated patterns; we're focusing on designs that are not only beautiful but also totally achievable for beginners. We'll start with the basics, showing you how to create easy henna patterns, then move on to step-by-step instructions for some super cute designs, and finally, we'll share some tips and inspiration to get your creative juices flowing. Whether you're prepping for a festival, a party, or just want to try something new, get ready to explore the art of henna with confidence and a big smile. No artistic talent needed, just a bit of patience and a willingness to have some fun. Let's get started!
Simple Henna Designs for Beginners: First Steps
Simple Henna Designs for Beginners: First Steps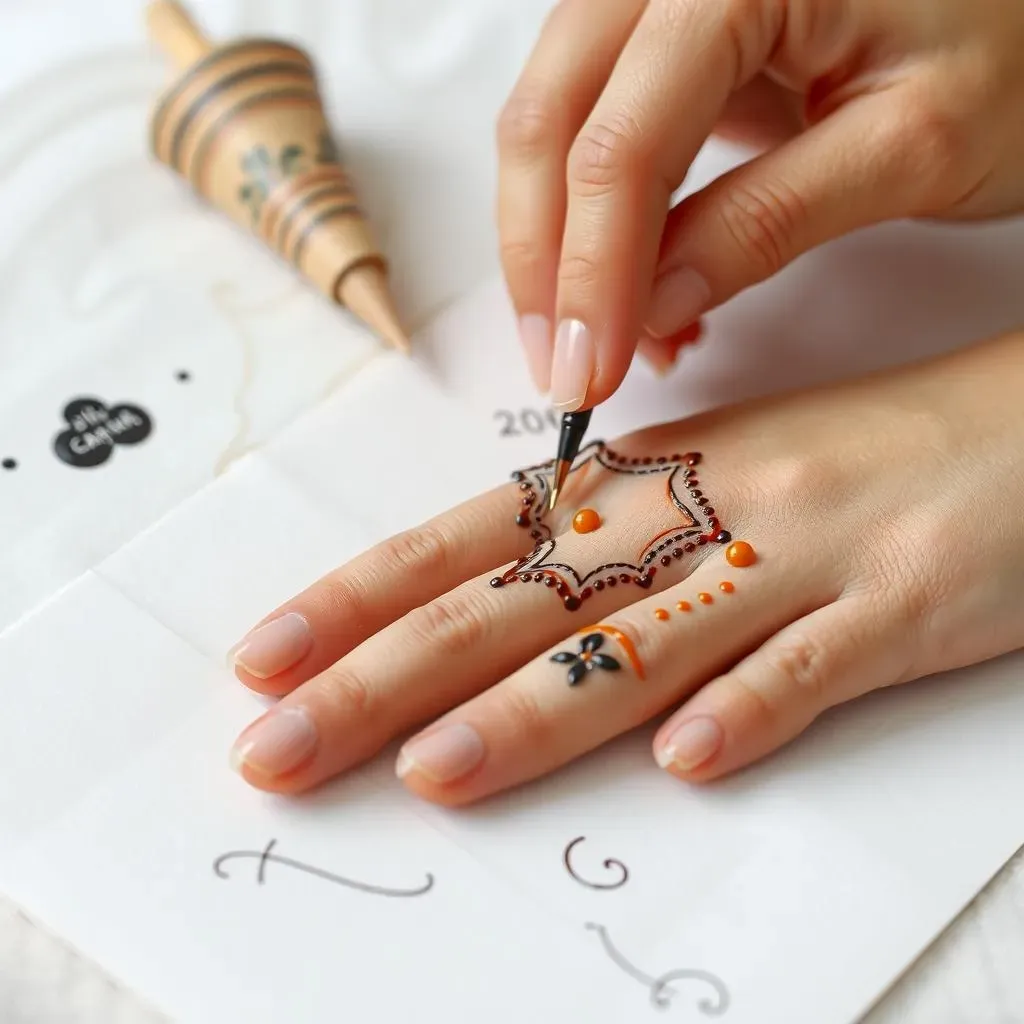
Alright, so you're itching to try henna, huh? That's fantastic! Before we jump into drawing intricate patterns, let's get a few basics down. Think of this as your henna 101. First off, gather your supplies: a good quality henna cone (pre-made is totally fine for beginners), some paper for practice, and maybe a damp cloth for any oops moments. The key here is to start simple. Don't go trying to draw a peacock on your first try, okay? Instead, begin with basic shapes like dots, lines, and small curves. These are the building blocks of all those gorgeous henna designs you see. Think of it like learning to write; you start with letters, not novels!
Now, let’s talk about pressure. The amount of pressure you apply to the cone will determine the thickness of the henna line. Practice on paper to get a feel for it. You want a nice, smooth flow, not a blobby mess. Start by holding the cone like a pen, gently squeezing to release the henna. Practice drawing simple shapes like circles and straight lines. Once you are comfortable with that, try connecting lines and dots to make simple patterns, like a vine or a flower. Don’t worry about mistakes, they are part of the learning process, and it's all going to wash off in a few days anyway!
Basic Shape | How to Practice | Why it's Important |
|---|---|---|
Dots | Gentle squeeze, lift quickly | Foundation for many designs |
Lines | Consistent pressure, smooth motion | Connects elements, creates structure |
Curves | Light pressure, fluid motion | Adds elegance and flow |
Easy Henna Patterns for Your Hand: StepbyStep
Easy Henna Patterns for Your Hand: StepbyStep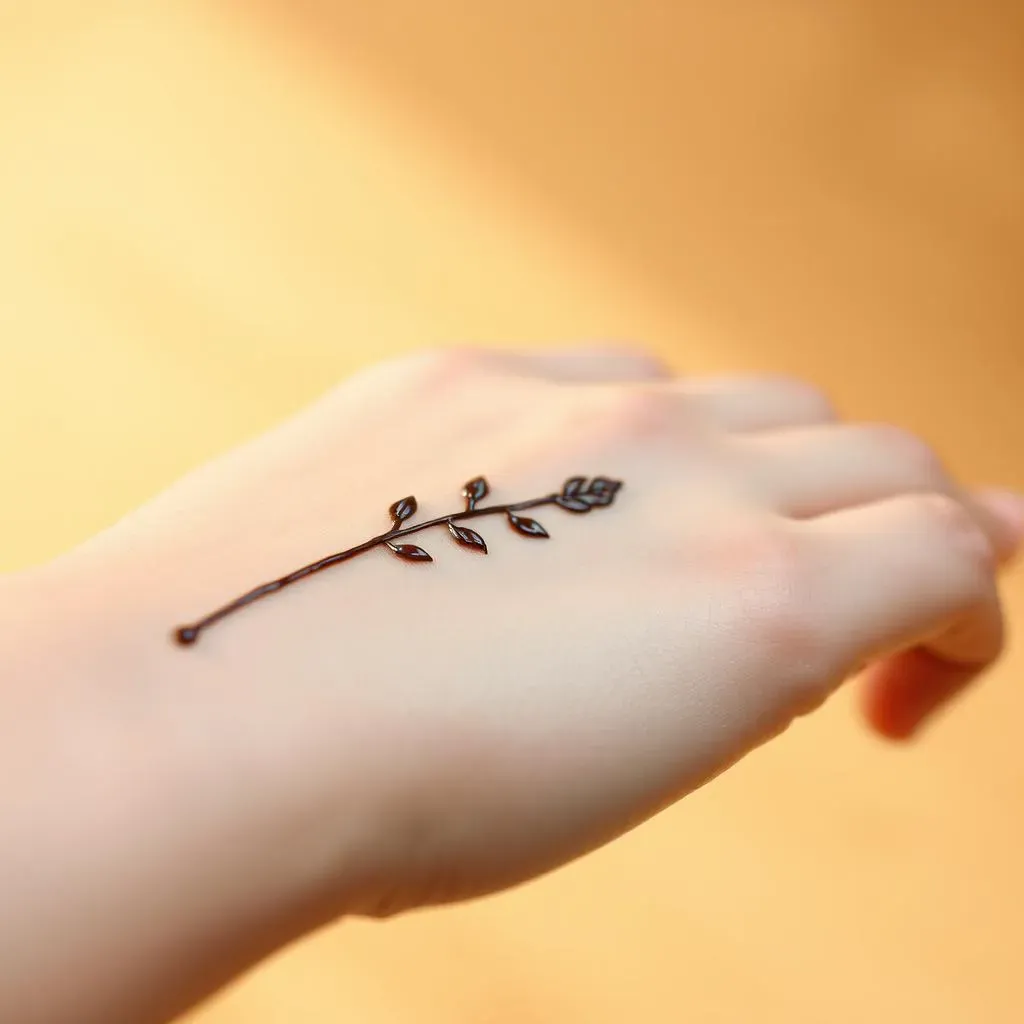
Okay, you've mastered the basics, now for the fun part: putting those skills to use! We're going to walk through a few super easy henna patterns that you can try on your own hand. Don't worry, we're not talking about anything crazy here, just simple, elegant designs that are perfect for beginners. First up, let's try a simple vine. Start by drawing a slightly curved line down the side of your hand or finger. Then, add small leaves branching off of the main line. These don't have to be perfect, in fact, a little asymmetry makes it look more natural. Think of it like you are drawing a plant, but with henna!
Next, let's try a dot pattern. This one is super simple, but it looks really effective. Start by placing a dot on your hand, then add more dots around it, creating a circle or a cluster. You can vary the size of the dots or the spacing to create a unique look. Another easy pattern is a simple geometric design. Try drawing a straight line down your finger and then add small triangles or squares along the side of the line. Remember, the key is to keep it simple and not try to do too much at once. It's about building up from basic shapes into something beautiful, one step at a time. And if you mess up? No biggie! Just wipe it off and try again. The beauty of henna is that it's not permanent, so have some fun with it!
- Vine Pattern: Curved line with small leaves branching off.
- Dot Pattern: Clusters or circles of dots.
- Geometric Pattern: Straight lines with triangles or squares.
Henna Designs Easy Hand: Inspiration and Tips
Henna Designs Easy Hand: Inspiration and Tips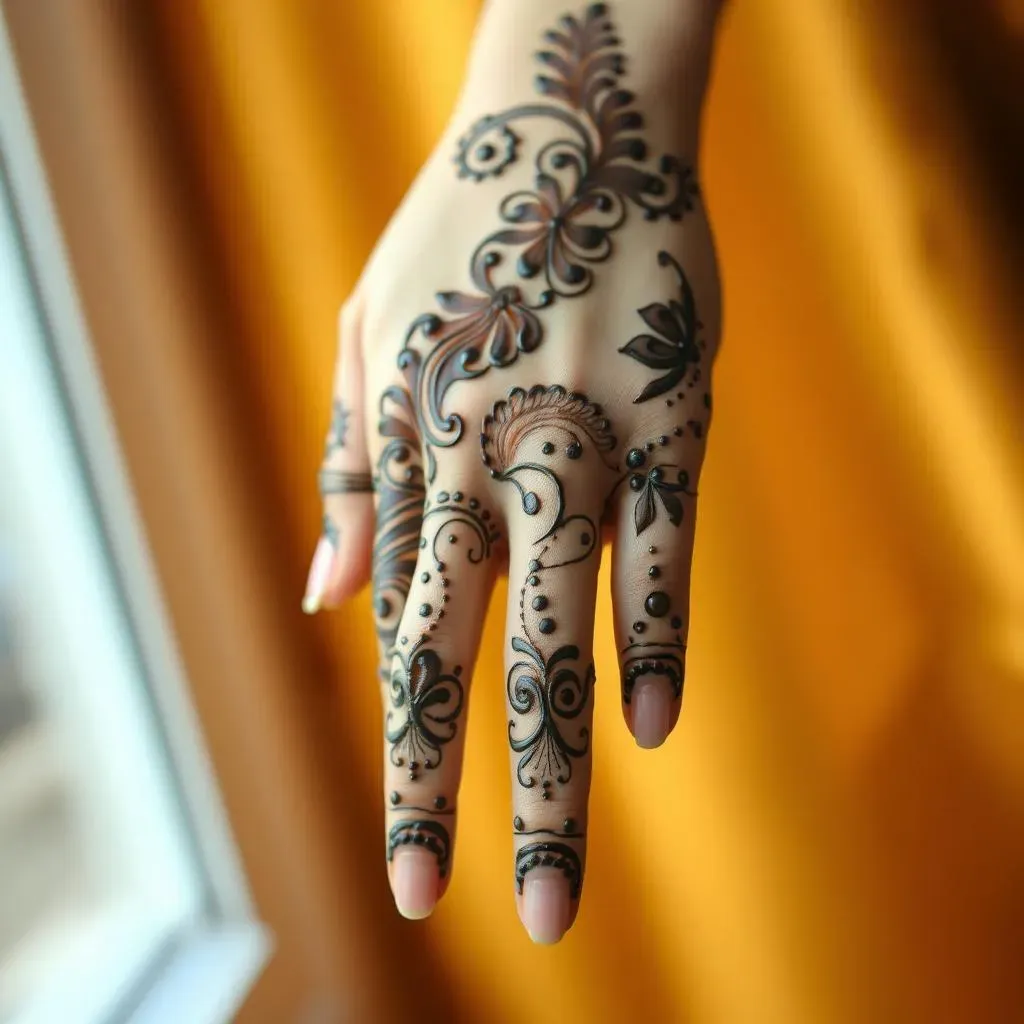
Find Your Style
Okay, you've got the basic techniques down, but where do you go from here? Well, the fun part is finding your own style. Look around for inspiration! Check out pictures online, browse through henna design books, or even just observe patterns in nature. Maybe you're drawn to floral motifs, or perhaps you prefer geometric designs. Don't be afraid to mix and match elements to create something that's uniquely you. The beauty of henna is that it's a form of self-expression, so let your personality shine through.
Think about what kind of look you want to achieve. Are you going for a delicate and subtle design, or something bold and eye-catching? There are no right or wrong answers here. Just play around and see what makes you happy. Start small by adding your personal touch to the basic patterns we've already covered. Maybe add a few extra dots, or make your lines a bit curvier. The more you experiment, the more you'll develop your own signature style. And remember, it's all about having fun and enjoying the process!
Tips for Success
Alright, let's talk about some tips to help you get the best results with your henna designs. First off, make sure your skin is clean and dry before you apply the henna. Any lotions or oils will prevent the henna from staining properly. Also, don't be afraid to use stencils or guides if you're having trouble with certain shapes. You can find stencils online or even make your own using tape and paper. Another great tip is to keep a damp cloth handy to clean up any mistakes as you go. It's much easier to fix a small oops than it is to deal with a big mess.
And finally, once you're done applying the henna, let it dry completely. This can take anywhere from 30 minutes to a few hours, depending on the thickness of the henna. Avoid touching the henna while it's drying, or you'll end up with smudged lines. Once it's dry, you can gently scrape off the henna paste, and you'll be left with a beautiful stain that will last for a week or two, depending on your skin. Remember, the longer you leave the henna paste on, the darker the stain will be.
Tip | Why it Helps |
|---|---|
Clean, dry skin | Ensures proper staining |
Use stencils | Helps with complex shapes |
Damp cloth | Easy mistake clean-up |
Let it dry completely | Prevents smudging |
Embrace the Imperfection
Let's be real, sometimes our henna designs don't come out exactly as we planned, and that's totally okay! In fact, it's part of the charm. The beauty of henna is in its organic nature; it's not meant to be perfect. Embrace the little imperfections, the slightly wobbly lines, and the uneven dots. They add character and make your design uniquely yours. Don't compare your work to others, just focus on your own journey and celebrate your progress.
Remember, practice makes progress. The more you experiment with henna, the better you'll get, and the more confident you'll become. So, don't be afraid to try new things, make mistakes, and learn from them. And most importantly, have fun with it! Henna is meant to be a creative and enjoyable experience, so let your imagination run wild. So, go grab that cone and start creating some magic on your hands, and don't worry if it doesn't look like a professional did it, because you did it!